On this page
Assessments
Assessments are automated tests that feature a collection of real-world programming challenges and/or Q&A challenges.
Creating Assessments
Qualified provides a selection of pre-built assessments you can use to get started quickly. You can also create your own template or duplicate an existing one to get started.
Importing from a Qualified Template Assessment
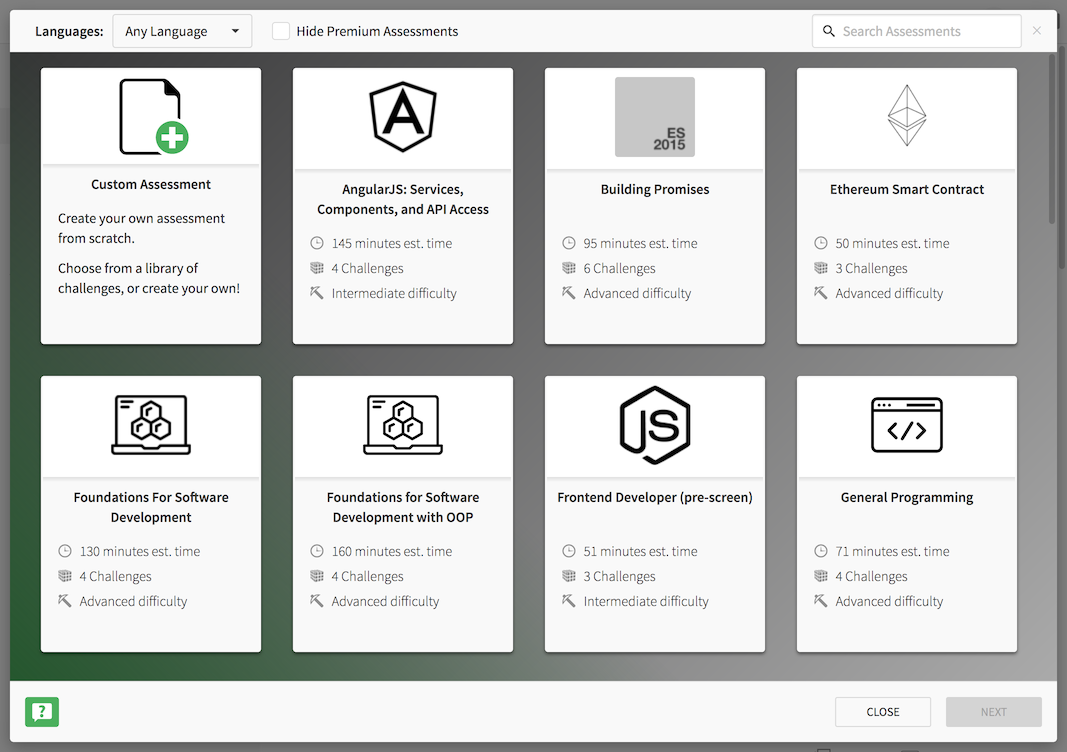
To get started, click the Assessments section at the top of the page, then click the CREATE AN ASSESSMENT button.
This will open up a dialog to let you pick from existing templates (or create your own from scratch).
You can click on the assessment templates to see details about them, such as which challenges are included and the reviewing guide.
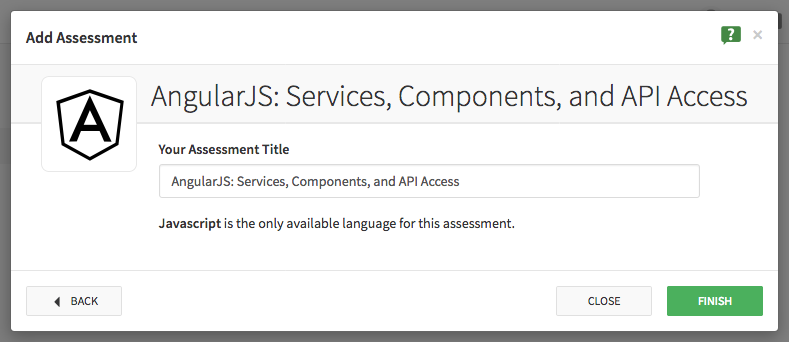
Once you've found a template you like, click on NEXT or SELECT THIS TEMPLATE to set the title and other options for your new assessment.
Your new assessment is now immediately ready to use to assess to developers.
Creating Your Own Assessment
To get started, click the Assessments section at the top of the page, then click the CREATE AN ASSESSMENT button.
Click on New Assessment in the top-left to open the New Assessment Wizard.
1. Assessment Details
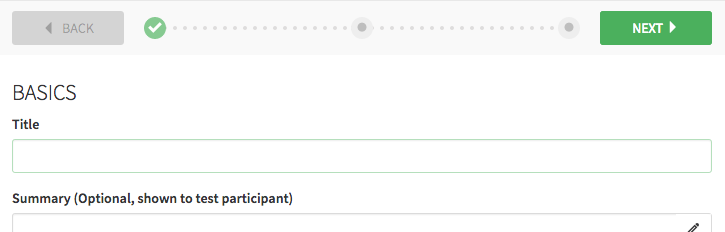
Here, you'll name your assessment and add in any details for the assessment, such as a summary or preferred language.
Configuring a Time Limit
You can configure a hard time limit for candidates. Once the time limit has been reached, the candidate's assessment result will be automatically submitted and they will no longer be able to edit it.
Using template challenges or custom challenges with estimated times can give you a good estimate for the total time of the assessment.
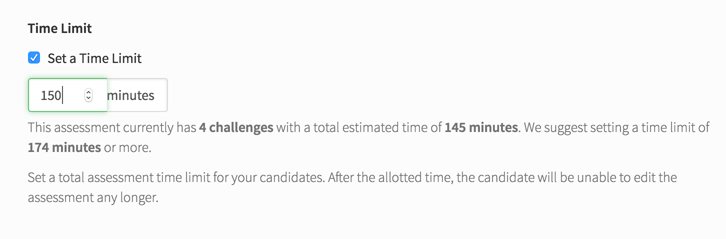
If all challenges still have an estimated time, the candidate will be shown the total estimated time for guidance. The timer will then count upwards instead of down and will have no hard limit.
To understand the timer from the candidate's perspective, see the candidate's Assessment Timer article reference.
Once you are finished, click NEXT .
2. Adding Challenges
Next, you'll add Challenges to the assessment. These can be selected from existing Qualified challenges or from custom challenges you have created and published.
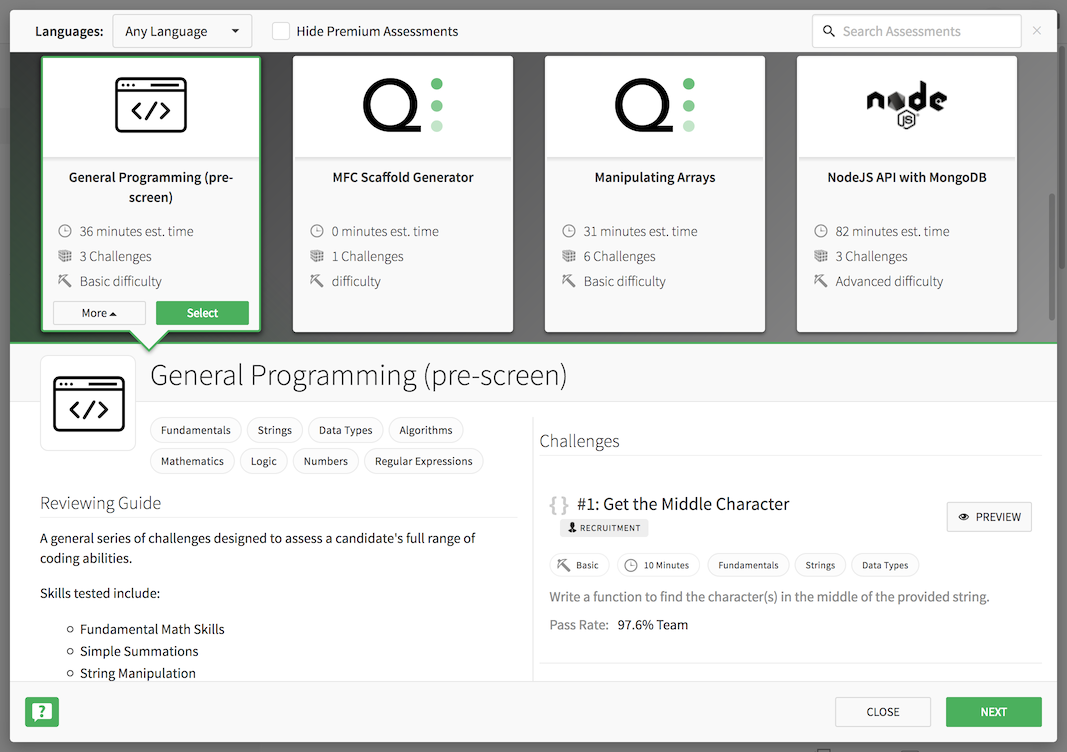
Click ADD CHALLENGES to begin selecting challenges. A dialog will open showing you the challenges you can choose from.
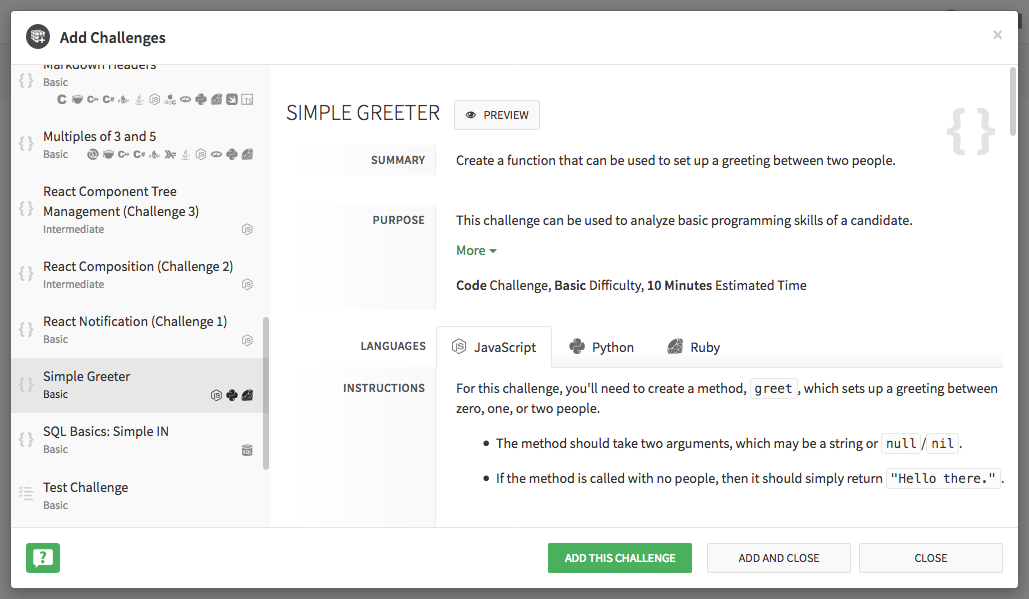
Along the left is a list of challenges. Selecting one of these lets you view its details. If you like the challenge, click ADD THIS CHALLENGE in the bottom to add the challenge to your assessment. You can then continue looking for other challenges to add to your assessment.
- If you have created any custom challenges, these will be presented by default. Otherwise, you can select from the Qualified Library.
- If there are too many challenges to find the one you want, you can search or you can expand the filters on the left to narrow down the list.
- You can also use the PREVIEW button to test the challenge immediately without leaving the page. This provides a sense of how the test participant may feel solving the challenge.
Once you've added all the challenges you want, click on CLOSE to close the dialog.
Organizing Challenges
You can rearrange the order of the challenges by clicking and dragging on the double-arrow on the left.
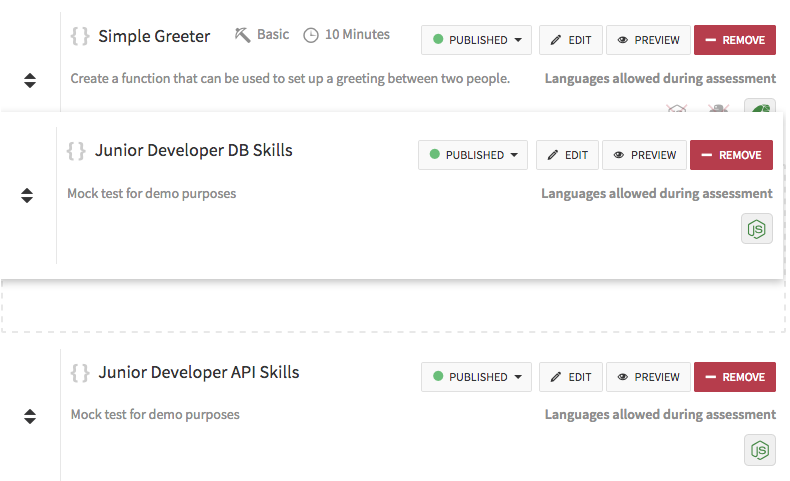
The final order is the order the candidate will be tested, so it makes sense to think about the overall progression of your assessment.
Disabling Languages
You can also disable specific programming languages on this screen, though at least one must remain selected. To disable a language, click on the language icon for that challenge. It will become deselected. A deselected language will not be available for use during the assessment.
3. Previewing Your New Challenge
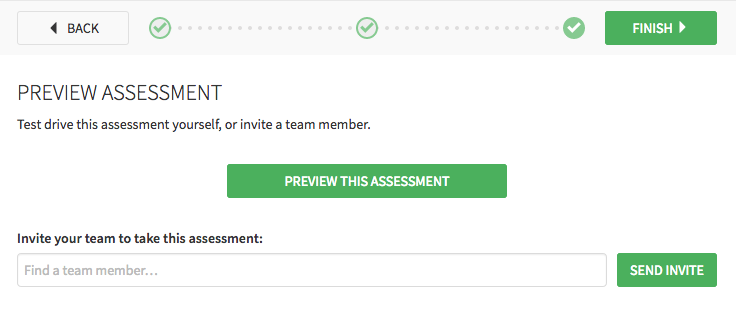
At this point you can preview your assessment and invite other team members to preview the entire assessment.
If you need to make any changes you can use the BACK button.
If you are satisfied with your new assessment, click FINISH . Your new assessment is now immediately ready to use to assess to developers.
Duplicating an Assessment

From the Assessment Details page, choose DUPLICATE to clone this assessment.
This will create a new copy of the assessment with the same challenges and options. You'll be taken to the Assessment Editor where you can make any further changes to the assessment and save it.
Editing an Assessment
Click on the Assessment's title from the Assessments tab to open the Assessment Details page. On this view, you can organize challenges by dragging them, ADD CHALLENGES and remove challenges.
Labels
Each assessment can be assigned to one or more labels of your choosing, making it easy to organize a large set of assessments.
Editing Assessment Properties
To change the assessment's title, summary or other properties, click on EDIT. This will take you to a page where you fine-tune how an assessment works, including:
- Adding a summary for the developer to read before starting the assessment
- Add a detailed reviewing guide for aiding reviewers in understanding the goals of the assessment
- Setting a default (preferred) language for the challenges
- Adding a default invitation message that is included when inviting developers to take the assessment
- Marking the assessment as invite-only to prevent link sharing
- Set a hard time limit on the assessment, after-which the assessment will be automatically submitted and the developer locked out.
Challenges
You can switch to the Challenges tab to select and reorder the challenges on this assessment.
Automated Workflows
Use simple-yet-powerful workflows to automate processing a candidate's assessment based on their score and timing.
These workflows can be used to automatically approve or reject a candidate, show a custom message, send them to a new assessment or external website, assign them to team members or labels, or even trigger custom webhooks.
Learn more about automated workflows here.
Viewing Assessment Details
When you click on an assessment, you'll be provided with some extra commands for the assessment, including:
- DELETE: Permanently delete an assessment not in use
- ARCHIVE: Archive an assessment to prevent further use
- DUPLICATE: Create a copy of this assessment, which you can then edit
- COMPARE SOLUTIONS: Compare all solutions to challenges within this assessment